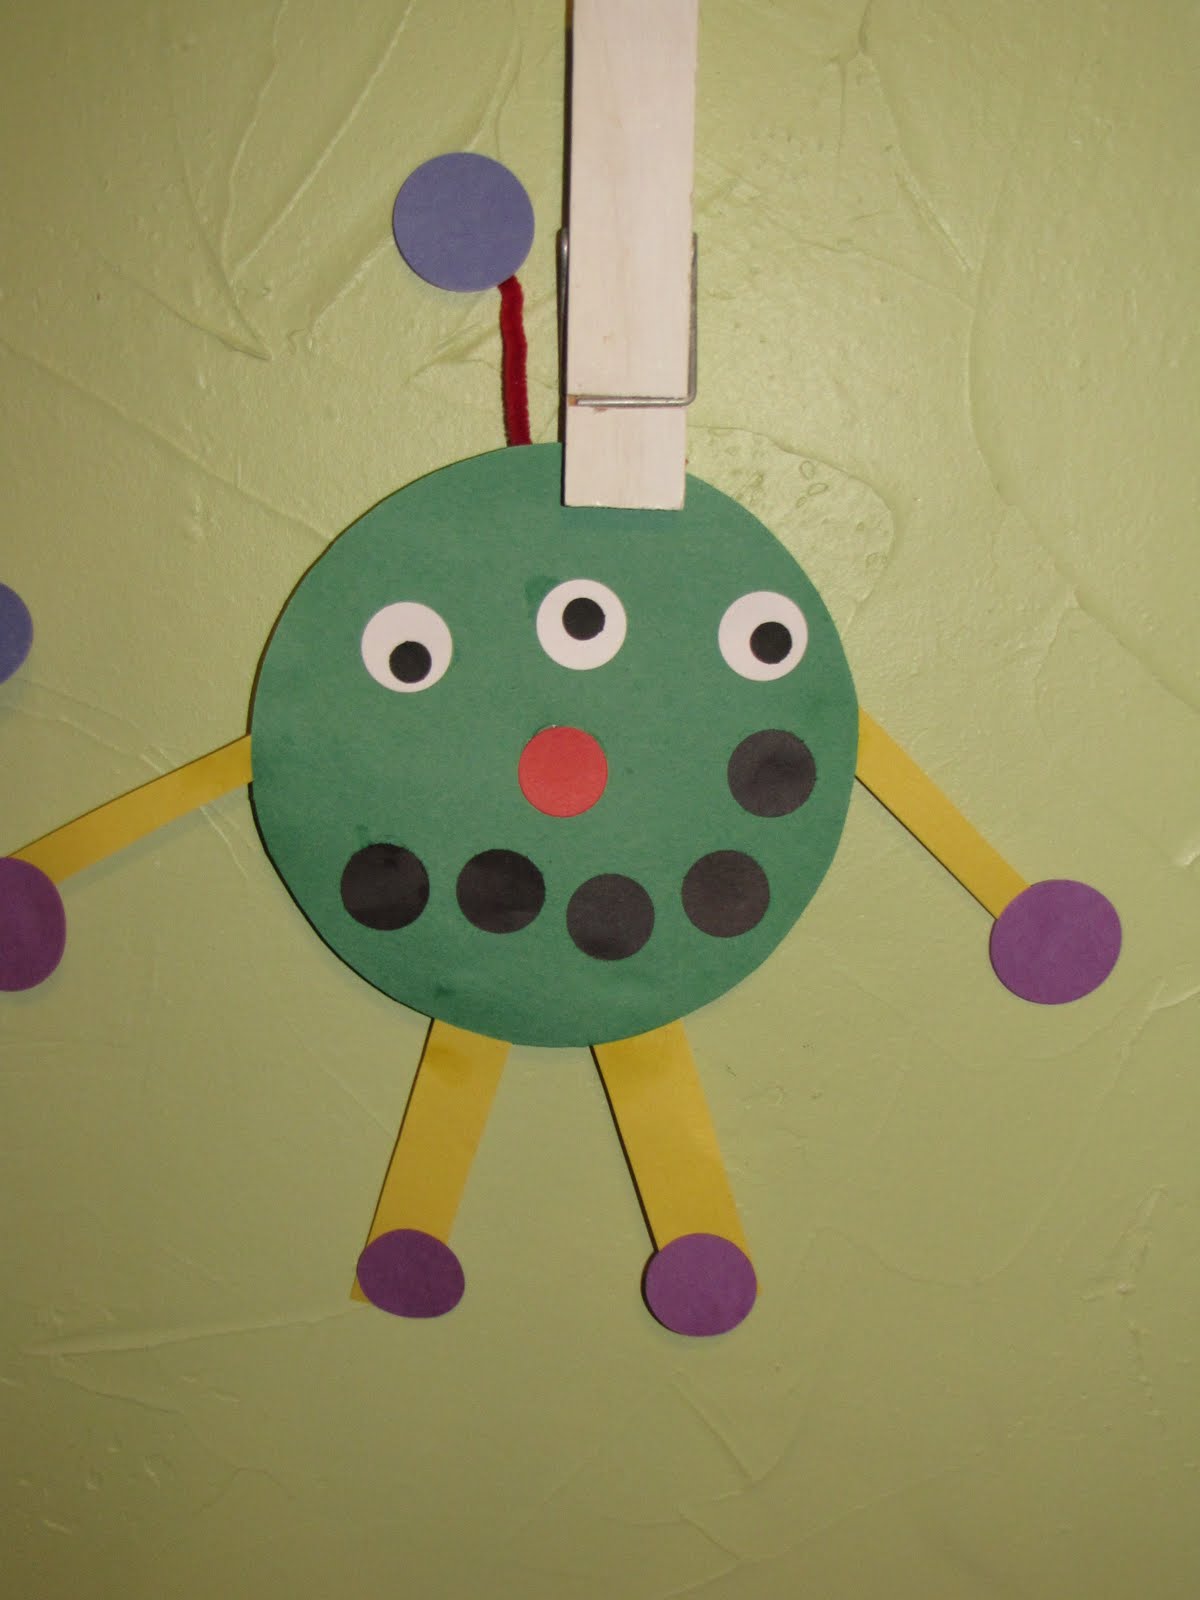
 This week, we are working on a shape review, so we are focusing on one shape per day. Today, we reviewed circles by reading a book, watching a powerpoint presentation, playing a shape game, and singing some songs. In addition to that, we talked about how we could take a simple circle and turn it into a variety of things, and then the kiddos got their chance to do just that! After all of that, we created this adorable shape monster (so easy). I used my circle punches and circle die cutter with my Sizzix. Let the children be creative by placing the pieces (in different colors) on the table for them to choose from.
Monday, August 30, 2010
Circle - Shape Monster - Free toddler / preschool craft
This week, we are working on a shape review, so we are focusing on one shape per day. Today, we reviewed circles by reading a book, watching a powerpoint presentation, playing a shape game, and singing some songs. In addition to that, we talked about how we could take a simple circle and turn it into a variety of things, and then the kiddos got their chance to do just that! After all of that, we created this adorable shape monster (so easy). I used my circle punches and circle die cutter with my Sizzix. Let the children be creative by placing the pieces (in different colors) on the table for them to choose from.
Tuesday, August 24, 2010
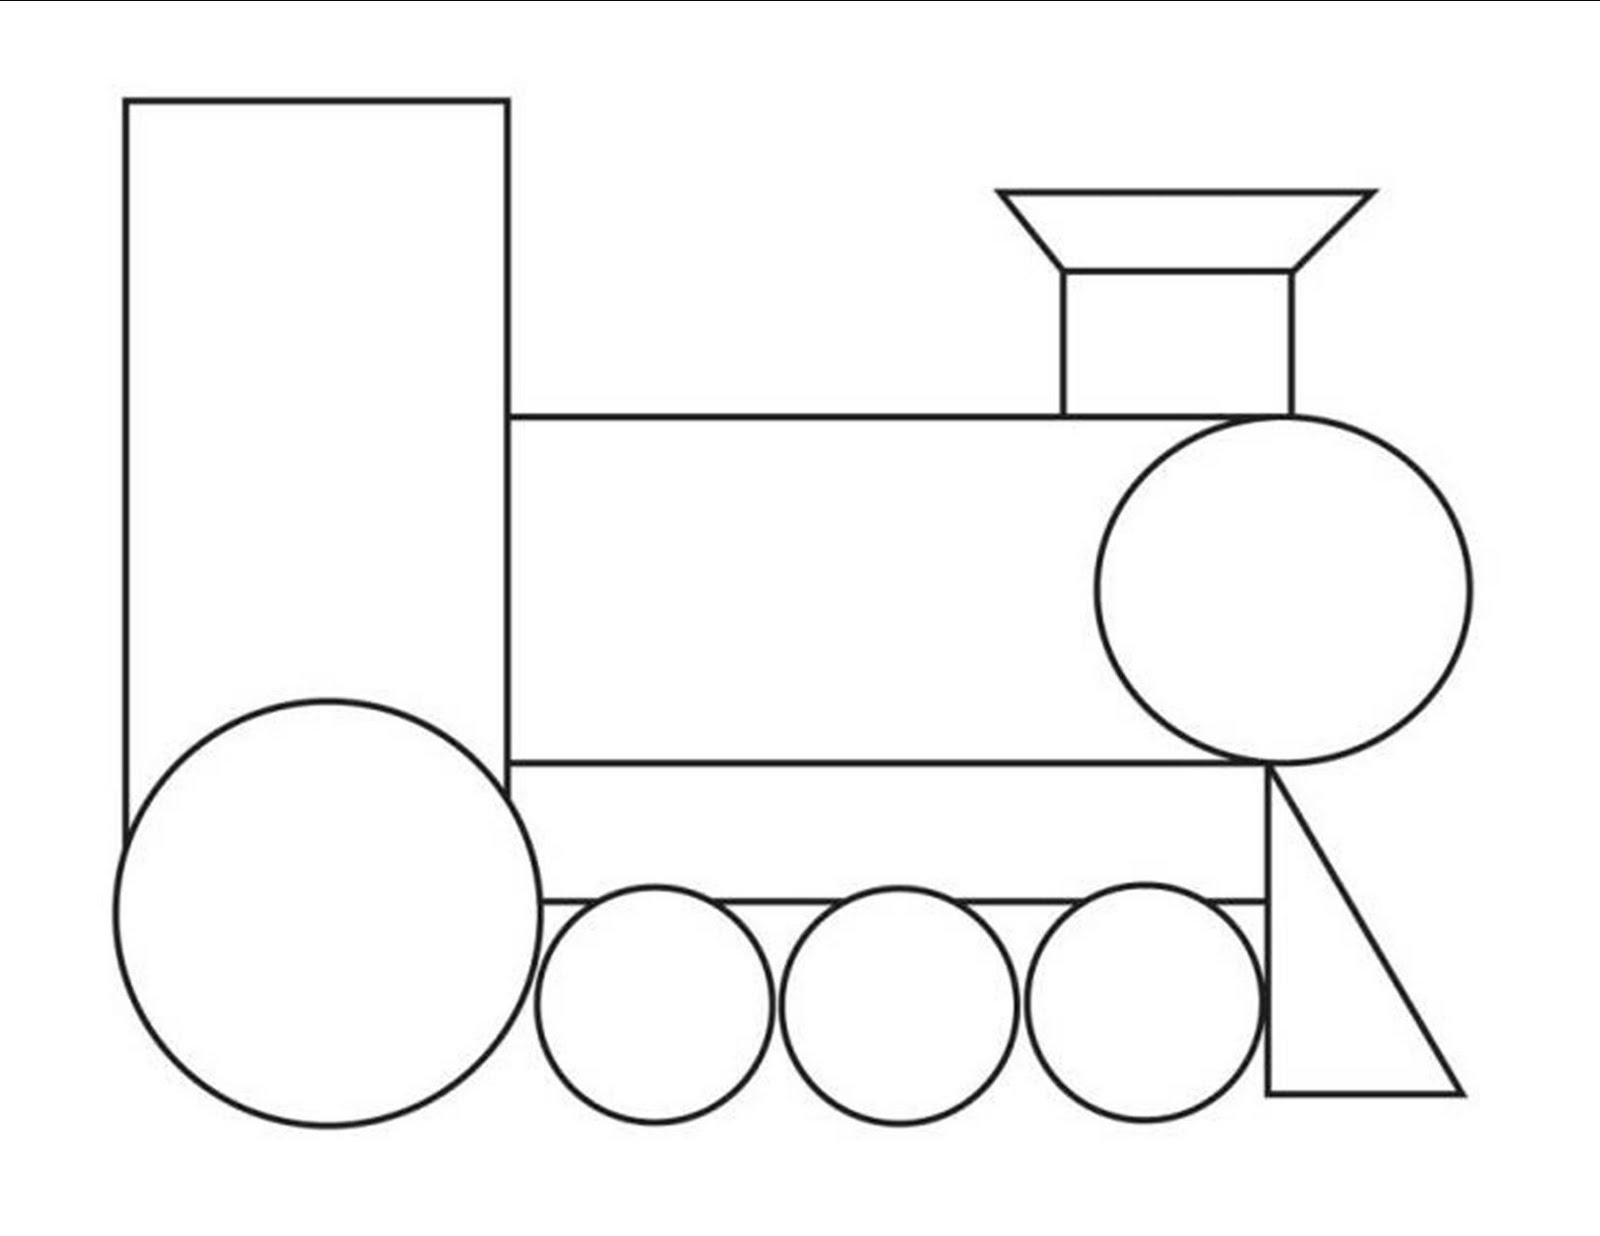
ALL ABOARD THE PRESCHOOL TRAIN

It's that time of year, and we are getting back into the swing of preschool around here. Our actual curriculum doesn't get started until September, but we are practicing our skills and learning the routine. This week, we are doing CHOO CHOO trains as our theme. I hope to share with you more of the fun crafts and projects we are doing this week (such as cubby labels and train picture frames made from my Silhouette die cutter and a fun tracing worksheet with a choo sticker made with my Xyron Create-a-Sticker machine). I love technology (when it is working!) This craft is a shape train puzzle that I found an image for on the internet (and I can't give credit because I don't even know where I found it, but thank you to whoever posted this!) I used the template to cut out pieces for everyone, and I printed a template for them to use as a puzzle. I was pleasantly surprised at how well they were all able to match the pieces. The ages ranged from 18 months to 5 years old. (The picture above was done by a 2 year old). Have fun!
Thursday, June 3, 2010
Balloon Nose Clown Craft - Circus / Carnival
 I cannot take complete credit for this as a friend shared the idea with me. The kids had a great time creating these clowns (even if they are kinda scary - IMO). We had an entire circus / carnival week, and these were the biggest hit of all the crafts. They are just a paper plate with some construction paper shapes and hair. We punched a hole in the middle and stuck a barely blown up red balloon through it and taped it down in the back. Easy and cute!
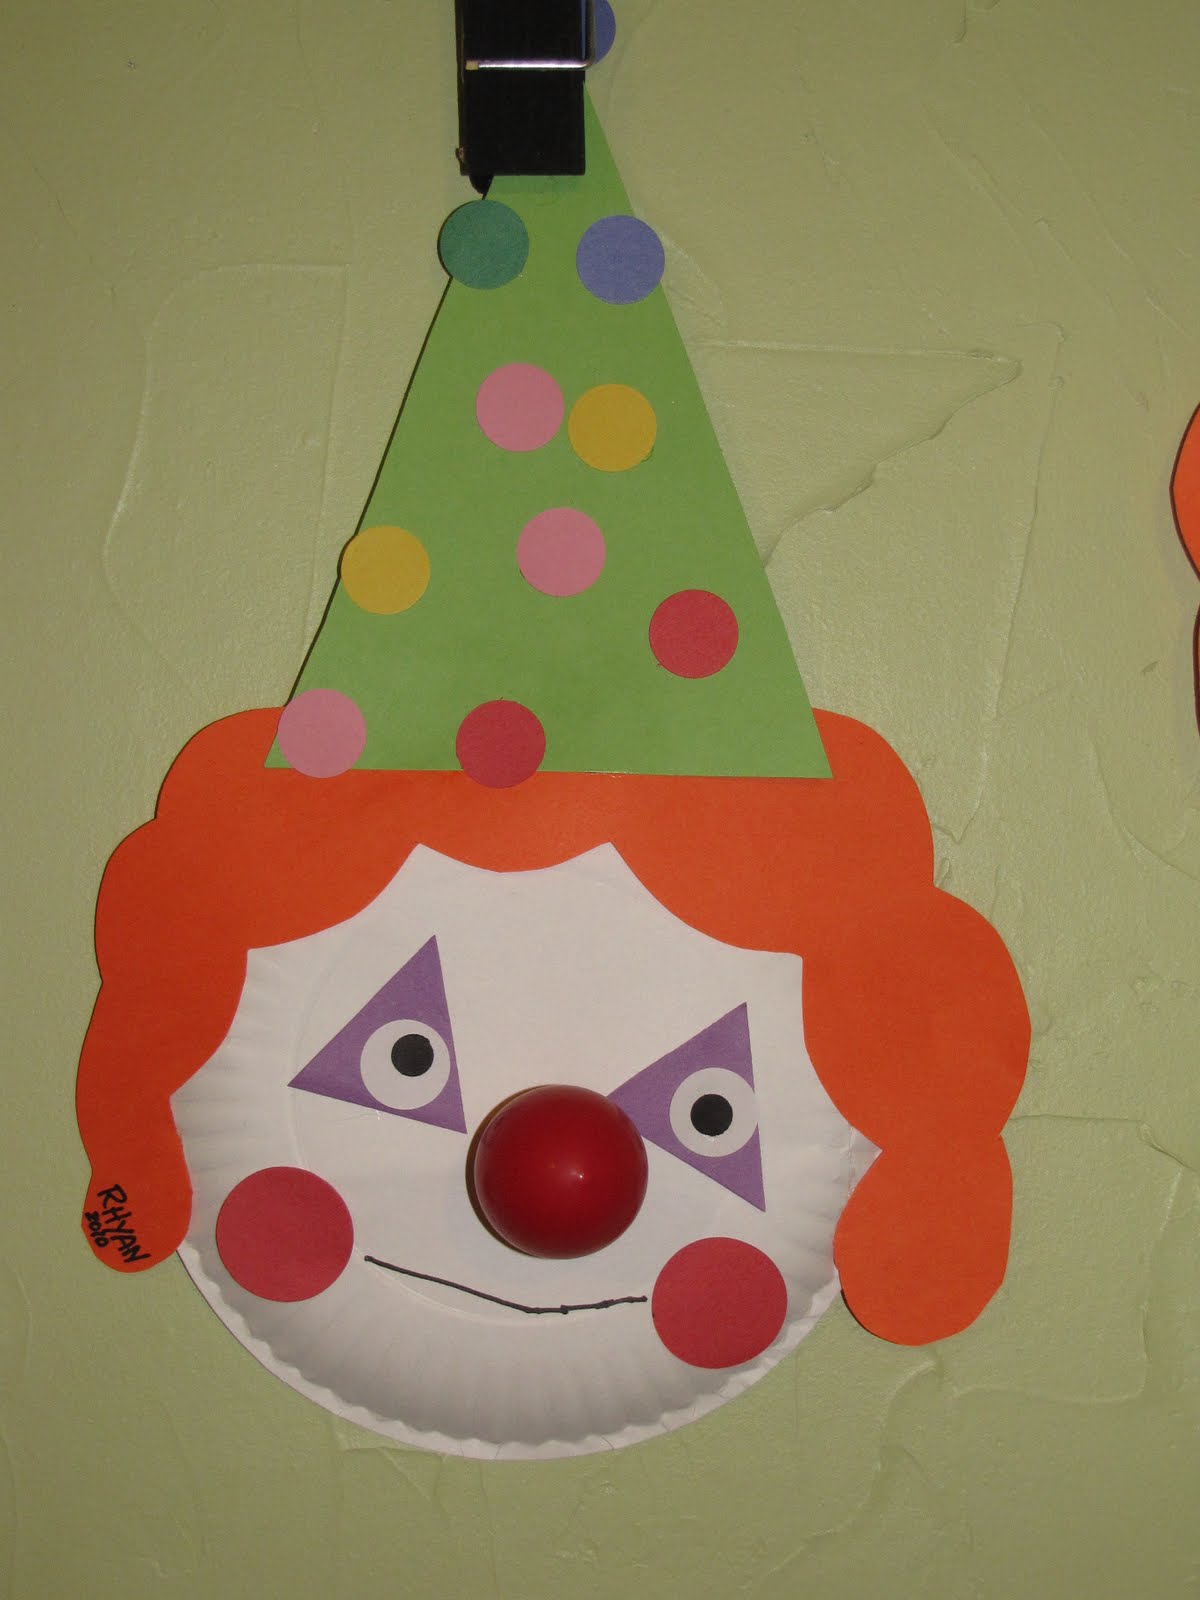
Wednesday, April 28, 2010
DIY Projector Screen - tutorial

Well, it's been a while since I've blogged, and I apologize because I am crazy busy with work, college, and soccer practice/games. I recently decided I wanted to add a projector screen to the daycare but didn't want to spend a fortune so here is what I came up with. I spent $22 for the fabric, ribbon, and dowel rod, and I didn't get anything on sale, so this really could be a lot chaper. I bought one yard of white fabric (I don't even know what it was now, but I made sure it was thick enough), and one yard of a cute black, pink, and white rick rack fabric. I bought two rolls of black with white dot ribbon (because my fabric store never has any grosgrain prints by the yard!!!). If you were to buy by the yard, I would suggest about 7-8 yards, but you will have to measure your own. I doubled the size of the screen (so it goes down the front and back) and added 24 inches to that amount.
 You can use any rolling shade pattern, but it's simple. You basically cut your fabric to the size needed. Sew right sides together around 3 sides leaving the top open. Turn. Sew about an inch or a little more on the bottom to form a casing (and you can leave that open or stitch closed once the dowel rod is inserted). I used a 1 inch dowel for weight. to attach it to the wall, hubby used a 1x2 and just stapled the fabric to the back, lifted it up to screw it into the wall and let it fall over the top of the wood. Make sure you place your ribbon before you do that, but it's very simple. Looks cute rolled up because the fabric shows!!! (I didn't have much room, so I put mine over my bulletin board).
 The kids are absolutely loving this!!! We have been using a circle time powerpoint presentation with all of our songs (good morning, weather, days of the week, months, etc.) and I try to create one or two extra for our theme each week. We are talking about picnics this week, so this is our watermelon seed counting presentation. Hope this inspires you to do something new :)
Thursday, April 1, 2010
Easter Craft Ideas - Knuffle Bunny craft
 Just a few craft ideas from this week. The first one is a fingerpainted chick. Just have the kids fingerpaint a circle/oval shape on the paper, draw on some legs and a beak with an orange marker, add a yellow feather and a googly eye . . . so much for that, huh? I had my kids do their painting on a piece of white cardstock, and we glued that to a piece of orange construction paper (for a fun little border).
 I love the way they all look different! I forgot to tell you that we added these little party hats. I had one who insisted on drawing a beak on the top of the chick's head, and then she changed her mind so we fixed it with a hat . . . then most of them wanted one. LOL. We work on ways to fix our mistakes without starting over or getting frustrated.
 And next we have KNUFFLE BUNNY!!! This book was a hit, of course, because I have lots of kiddos with blankies and pacifiers! They could definitely relate to losing their security object.
 Knuffle Bunny is a great story! Our craft is a dryer with Knuffle Bunny in it. To make it, cut the center out of a paper plate and paint that gray. Set aside to dry. Take a piece of wax paper and trace a paper plate on it. Cut just inside the line. I don't have the Knuffle Bunny template that I used, but you can free hand it. Make your bunny from construction paper and add the features. Glue the bunny to the wax paper and then staple on the back of the plate. Glue a black square on for the door. As much as I prefer cute little crafts, my kids LOVED this one because it gave them something to tell their parents. Many insisted on carrying them around all day - lol.
 Knuffle Bunny is a great story! Our craft is a dryer with Knuffle Bunny in it. To make it, cut the center out of a paper plate and paint that gray. Set aside to dry. Take a piece of wax paper and trace a paper plate on it. Cut just inside the line. I don't have the Knuffle Bunny template that I used, but you can free hand it. Make your bunny from construction paper and add the features. Glue the bunny to the wax paper and then staple on the back of the plate. Glue a black square on for the door. As much as I prefer cute little crafts, my kids LOVED this one because it gave them something to tell their parents. Many insisted on carrying them around all day - lol.
Monday, March 29, 2010
Easter Preschool Toddler Theme Week
Long time, no blog, huh? Well, it's partly because I didn't find the time and partly because I'm crazy busy (like the rest of the world). My college classes have gotten much more serious, but I'm truly enjoying myself. It's just difficult to find time to work, do homework, and still be a mother . . . .
However, we did manage to sneak out of town over the weekend for a trip to San Antonio (Sea World), and we had a blast!!! The weather was gorgeous, and none of us had been to Sea World so it was a great adventure. I loved the whales. The kids loved feeding the dolphins.
Back to work though . . . . it's a gorgeous day here, and the kids are playing in the sand so I have a few moments to update you on this week's theme. We are learning about Easter stuff (bunnies, eggs, chicks). We have a busy week planned, and we are very excited about the Easter Egg Hunt on Thursday as well as the possibility of the Easter Bunny stopping by to leave us some goodies.
CIRCLE TIME ACTIVITIES
I recently created a powerpoint presentation of our circle time songs using music by Dr. Jean Feldman. I just threw it together with an owl theme (since that is our room theme), and the kids love it. I don't use every song every day, and I plan to add more to it, but typically we sing "Hello, How are You" to start, followed by "Days of the Week", "Months Macarena", and "What Will the Weather be Today?" Her music is available for download online, and I recommend it. We have her "Tidy Up" song at the end of the presentation, which I use several times during the day, and the kids seem to clean much better with it on. (We use this presentation every day)
Monday - Egg color / shape powerpoint presentation (I can email this to you, but it is just a simple slide show with 10 colors of eggs (one per slide), two slides containing five of those colored eggs so I can ask for volunteers to find a certain color. Then, there are two slides with bunnies hiding shapes (circle, square, rectangle, triangle). When you push the button, the bunny moves to reveal a shape, and you have a child tell you the shape. (Frogstofairydust@cox.net if you want me to send it to you)
Tuesday - Egg numbers and letters magnet board activity. These are from Childcareland.com (can't say enough nice things about this site - it's wonderful). They are just egg shapes with numbers and letters on them. For fun, print out a bunny graphic (I got mine from scrappindoodles.com), laminate, and glue to a craft stick for a themed pointer.
Wednesday - Egg visual discrimination game. (this is also from childcareland.com) We play this as a group and also at individual centers.
Thursday - review ppt presentation on colors/shapes
Friday - review letter / numbers activity
SONGS (in addition to what we sing everyday)
Little Bunny Foo Foo
I'm a Little Bunny
MOVEMENT
The Bunny Hop (poem/movement)
Bunny Hop Race (hop to basket, drop in egg - relay type)
Hot Egg (Hot Potato) to bunny music
SMALL GROUP ACTIVITIES
Color egg hunt (they will hunt for a color designated to them)
Egg spoon race
Easter Egg hunt
BOOKS
The Night Before Easter
The Easter Bunny is Missing
Max's Easter Surprise
Knuffle Bunny
LEARNING CENTERS
Language: Easter Egg Tracing, Bunny Writing skills (childcareland.com)
Math: Plastic egg counting/sorting. Egg patterning.
Discovery: dying Easter eggs
Manipulatives: Plastic egg size sorting, file folder games (size sort, puzzle match)
Sensory: Pom Pom egg match (put matching poms for each plastic egg)
Blocks: Add bunny, chicks, and easter eggs
Dramatic Play: Easter Egg hunt supplies
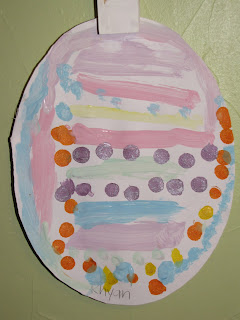
Phew - that was a lot to share. And lastly, today's craft was painted Easter eggs. Just mix regular paint colors with white to make them pastel and let the kids use their imaginations. For fun, bring in dot paint/markers.
Wednesday, March 10, 2010
Lucky Leprechaun craft
 Ok, I had great intentions with this craft. I made a pattern and scanned it, and I threw away the original pieces without looking to see if they scanned properly (I know - get it together chick!). Anyway, when I went to share it, it's gone because today is trash day. So, I am just going to tell you this is super easy to make yourself, and you have to trust me. Cut a circle from white cardstock or construction paper (use a toddler plate for a template). Do the same for a piece of peach tissue paper. Cut a green hat from construction paper, and then cut a band and a buckle. I used lime green for the band, but black or white would work too. Cut an oval nose out of pink construction paper and two little black eyes. Then cut orange strips for the hair. I used a paper crimper to add texture, but you can leave it alone or fold your paper in accordian style. I like to outline stuff with a permanent marker, but that's completely unnecessary. Use your marker to add eyebrows and a whimsical mouth after you glue everything together. SO CUTE (as my 2 year olds like to say about them).
Subscribe to:
Posts (Atom)